C#开发windows程序学习记录
C#开发学习记录1
开发环境:Visual Studio 2022
前言
从高中时就对开发软件比较感兴趣,用过pygame写过小游戏,当时其实也想用Unity来写个游戏来着。不过高中确实学业压力比较重,加上Unity主要是用C#作为编程语言的,当时也没接触过C#语言,就不了了之。大一又误入安全歧途:smirk:,一直在打ctf,现在趁寒假学点windows程序开发。一开始我看了b站上的视频学习windows程序设计,用的是windows api,不过都是上古(指5年前)的产物了。后面一问gpt才发现,C#是 Windows 应用程序开发的首选语言,尤其是对于快速开发而言。这里就不再从基础语法学起,直接结合ai智慧搓一个小项目来学习吧。
因为我平时做学习的记录都是直接用markdown记录,那么如果想将文章部署到我的博客
这里我们的项目目标是将一般的Markdown文件转换成Hexo特定主题的文章格式,其实hexo是可以直接解析markdown语法,但是需要手动把图片复制到特定目录下,并且图片的显示却会出现问题。看了hexo的开发文档发现可以用{% asset_img img_name %}来指定显示的图片。那么我们可以就以这个目标来学习windows的程序开发。
先安装个AI辅助插件,增加效率。
功能设计
- 用户界面 (UI) 设计
- 功能
- 提供直观的图形界面,让用户轻松完成文件选择、设置和 Markdown 文件转换。
- 具体实现
- 文件选择界面:使用
TreeView或ListView显示文件夹结构,支持拖拽文件。 - 设置界面:使用
TextBox、ComboBox等控件来输入 Hexo 路径、选择主题、设置发布模式,切换语言等。 - 进度显示和日志:在转换和处理过程中,显示进度条、日志或消息提示,帮助用户了解当前操作进展。
- 错误提示:当出现错误时,显示友好的错误消息,帮助用户解决问题。
- 文件选择界面:使用
- 设置界面 (Settings Interface)
- 功能
- 设置 Hexo 本地路径,让程序知道 Hexo 文件夹的位置。
- 设置显示字体与大小。
- 选择 Hexo 主题,或者设置 Hexo 相关配置项。
- 设置显示语言
- 具体实现
使用表单控件(例如
TextBox、ComboBox等)来接收用户输入的路径、模式和主题等信息。使用
FolderBrowserDialog来允许用户选择本地 Hexo 路径。提供保存设置的功能,可以将用户选择的路径和设置保存到配置文件中(如
.json或.xml格式)或者注册表中,保证下次启动时能够恢复。
- Markdown 转换和图片处理功能 (Markdown Conversion and Image Handling)
- 功能
- 将用户选定的 Markdown 文件转为 Hexo 特定主题的文章格式。
- 自动处理图片,复制到 Hexo 主题的特定目录,并使用 Hexo
的图片语法(例如
{% asset_img img_name %})来引用图片。
- 具体实现
- 解析 Markdown 文件内容,是直接使用文件IO操作,增加和替换特定内容。
- 提取 Markdown 文件中的图片路径并处理:
- 将图片文件复制到 Hexo 主题目录中的
/source/images/或其他指定目录。 - 在生成的文章中,使用 Hexo 语法
{% asset_img img_name %}来引用图片。
- 将图片文件复制到 Hexo 主题目录中的
- 图片复制时,检查目标目录是否已经有相同的文件,避免覆盖。
- 可以使用正则表达式或其他文本处理方法来解析和替换 Markdown 中的图片路径。
- 插件系统 (Plugin System)
- 功能
- 允许未来扩展,比如自动获取 Hexo 特定主题配置、提供更多 Hexo 主题支持、图像优化等。
- 可以支持插件的安装、卸载和更新。
- 具体实现
- 设计插件接口,允许通过 DLL 动态加载插件。
- 使用 C# 的反射(Reflection)机制动态加载插件并调用其中的功能。
- 设计一个简单的插件管理器,允许用户选择和管理插件。
- 可拓展性和未来计划
- 功能
- 未来可以加入更多的 Hexo 特定功能,如一键获取和配置 Hexo 特定主题,自动生成页面摘要、标签等。
- 也可以扩展支持其他平台的静态网站生成器,或者为用户提供更多的 Markdown 格式转换选项。
- 具体实现
- 通过插件架构,将新功能封装为独立的插件,用户可以根据需求安装和启用。
- 提供 SDK 或文档,允许第三方开发者为项目开发自定义插件。
UI界面设计
菜单栏实现
创建好项目后,将会看到一个默认的窗体(Form)。默认情况下,Visual Studio 会打开窗体的设计视图(设计器视图),可以在这里设计界面。
比如我们要添加按钮组件,就可以在 设计视图 中,你可以通过工具箱拖放控件来创建界面元素。
- 打开 工具箱(通常位于 Visual Studio 窗口的左侧,如果没有看到工具箱,可以通过 视图 > 工具箱 打开)。
- 在 工具箱 中,找到 按钮(Button)控件。
- 将按钮从工具箱中拖动到窗体上。
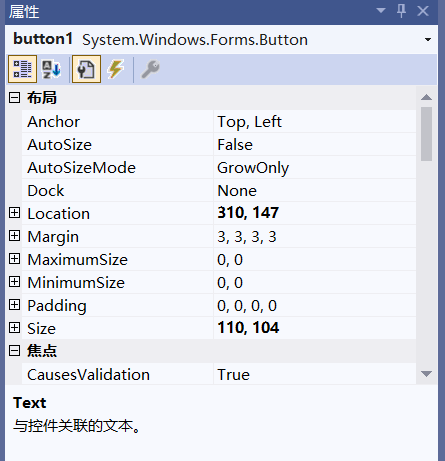
- 放置按钮后,你可以调整按钮的位置、大小以及其他属性。
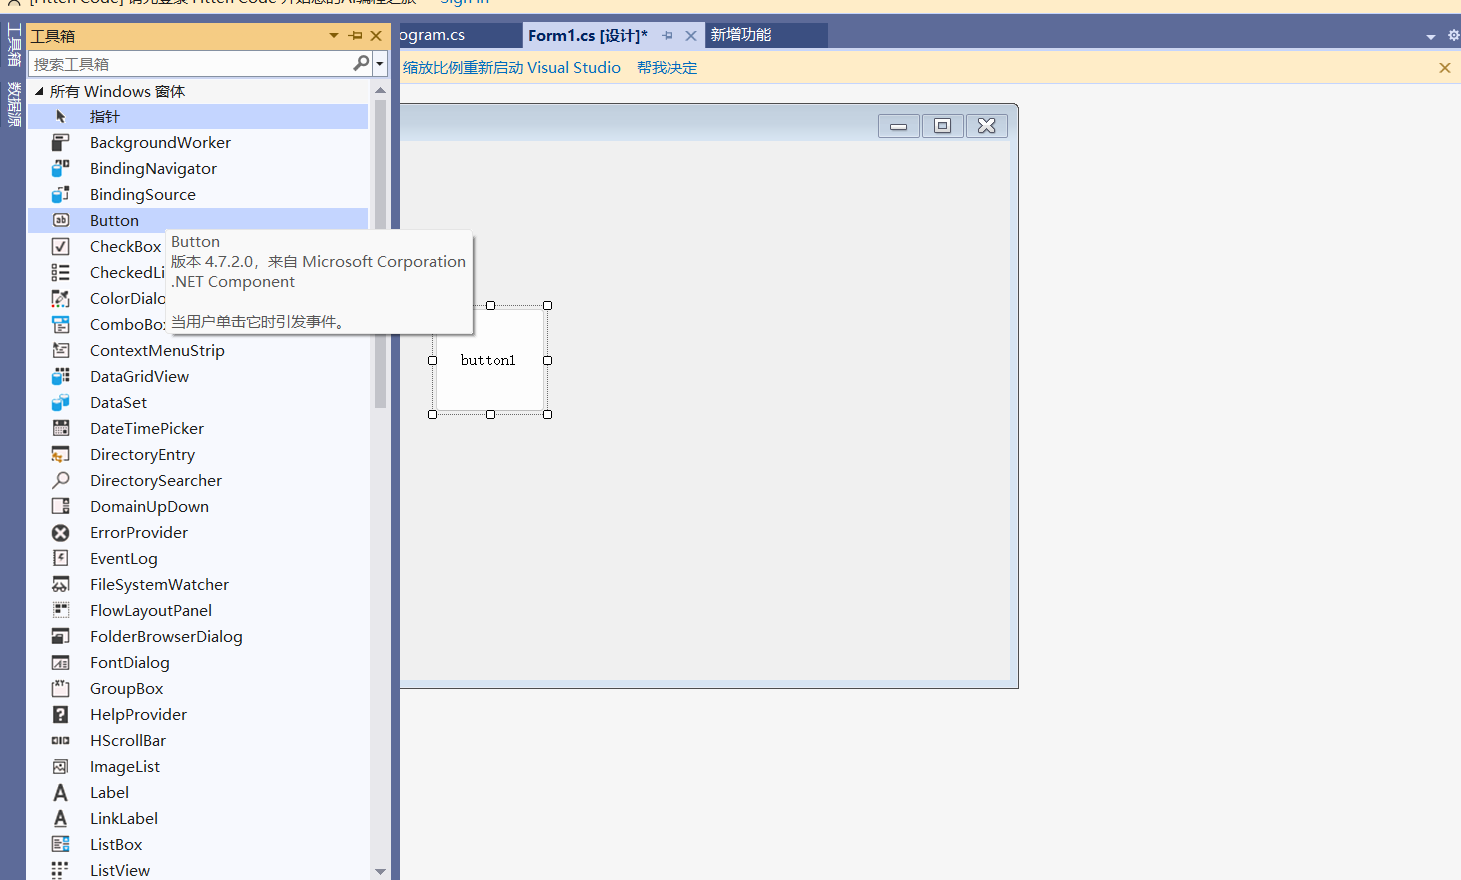
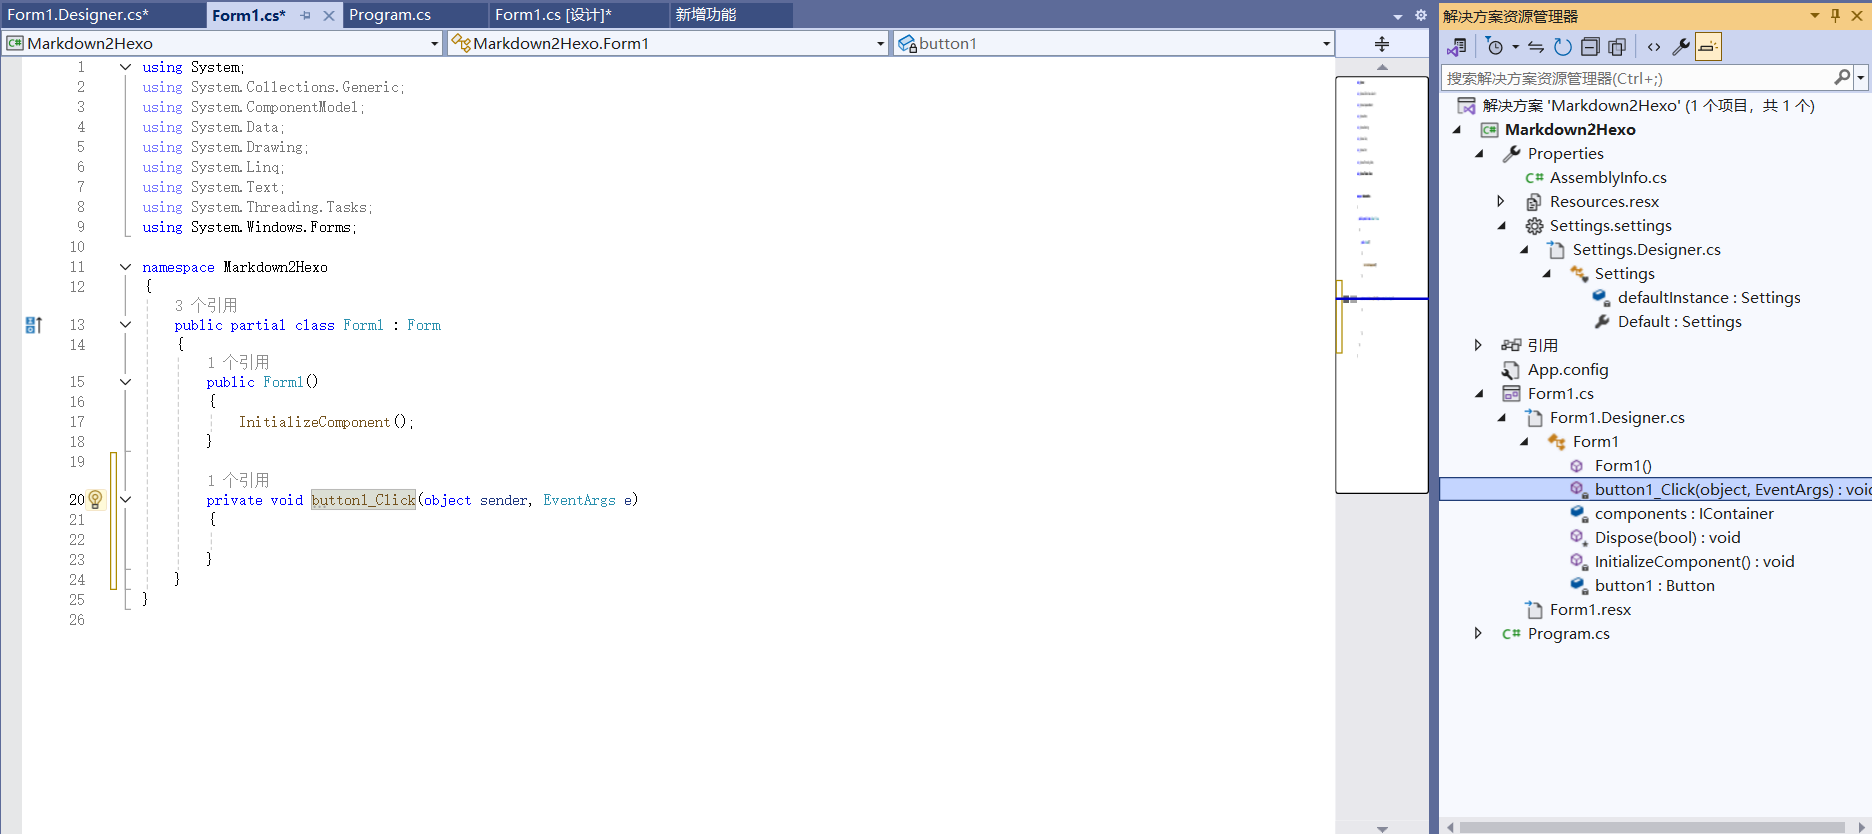
之后就会创建button1的组件,我们可以在button1_Click中设计其被点击后的行为。
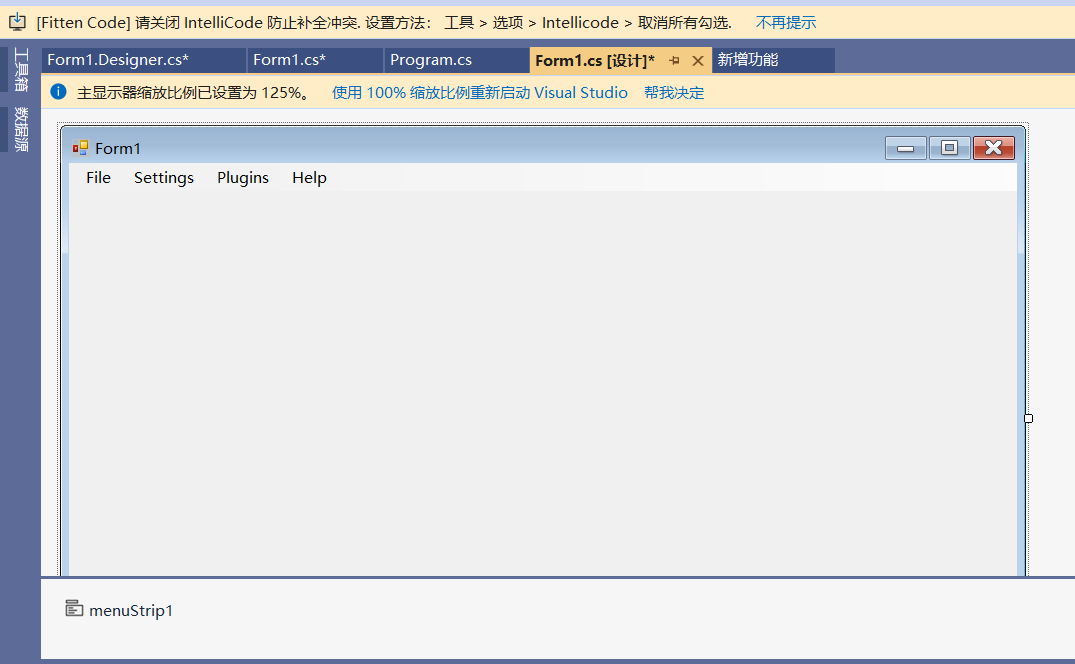
不过常见的菜单栏组件一般为MenuStrip控件,而不是靠button的堆叠。这里我们的目标是先实现一个菜单栏,里面有打开、设置、插件和帮助四个选项。过程就是从工具箱中选MenuStrip拖到设计图中。我们还可以设置子菜单,但这里我们先从简单的功能实现起,暂时不用子菜单。
接下来我们要实现的是点击 File 菜单后,显示本机目录选择对话框,并将选中的文件目录保存到某个变量。首先我们来看一下InitializeComponent的实现,这里所有菜单组件的实现都类似,所以我们只用看一个File组件对应的实现。实际上,这些代码都是自动生成的,不需要我们更改。但为了更好理解过程,这里进行细致的学习。
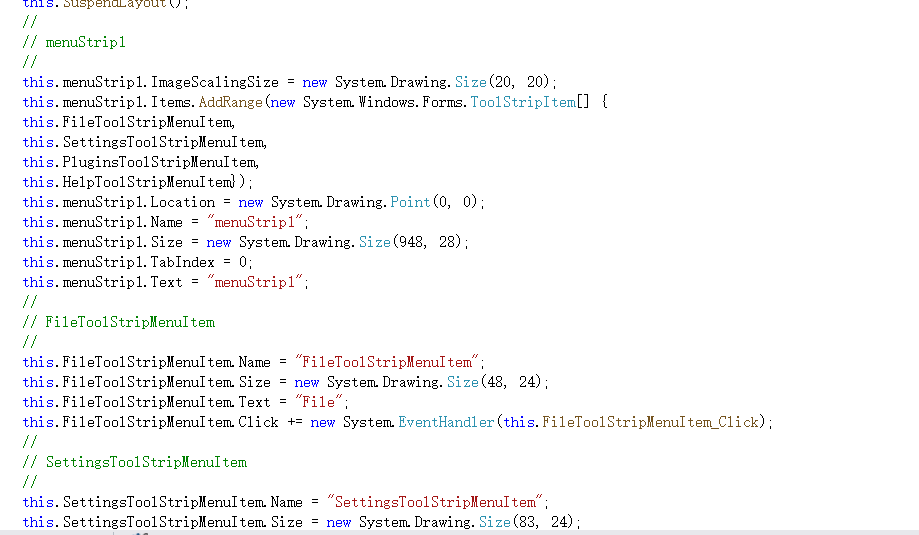
1 | // |
menuStrip1:这是菜单栏的容器控件,负责将菜单项(如
File)显示在窗体顶部。
FileToolStripMenuItem:这是菜单栏中的一个菜单项,用来表示
File 菜单。
this.menuStrip1.Items.AddRange(...):将多个组件添加到
menuStrip1 中,表示在菜单栏中添加 File
、Settings等菜单项。
this.FileToolStripMenuItem.Click += new System.EventHandler(this.FileToolStripMenuItem_Click);:这行代码表示当点击
File 菜单项时,会触发
FileToolStripMenuItem_Click 方法。
其余一些设置名称和设置大小的内容就不作赘述。
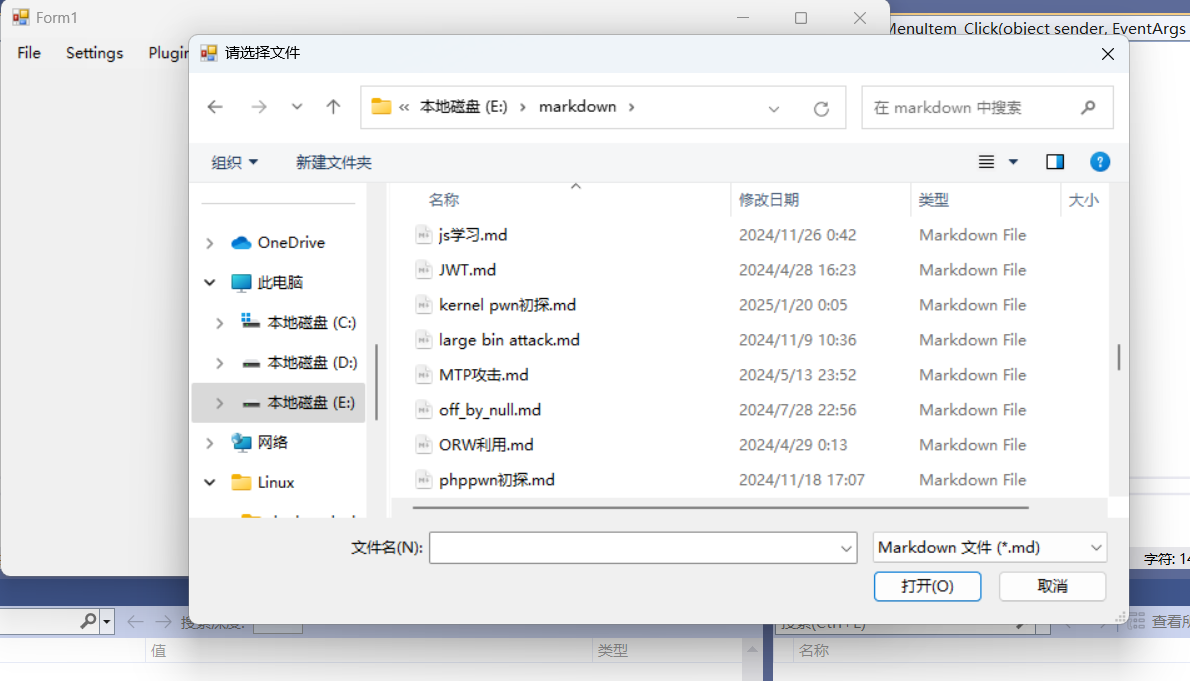
可视化文件选取实现
FileToolStripMenuItem_Click实现如下(在Form1.cs中),是用OpenFileDialog实现可视化菜单。
1 | using System; |
获取到了选择的文件后,就可以进行进一步的处理了。为了将业务逻辑和具体的功能处理应该尽量与界面逻辑分离,所以我们要新建一个FileProcessor类,里面创建ProcessMarkdownFile方法来用于实现业务逻辑。而在Form1.cs中可以简单的创建对象并调用其方法。
1 | //Form1.cs |
1 | //FileProcessor.cs |
窗口大小获取
获取各组件大小是设计UI的关键内容。
获取整个窗口的大小
1 | // 获取窗口的大小(不包括标题栏和边框) |
获取 MenuStrip 的大小
1 | // 获取 MenuStrip 的大小 |
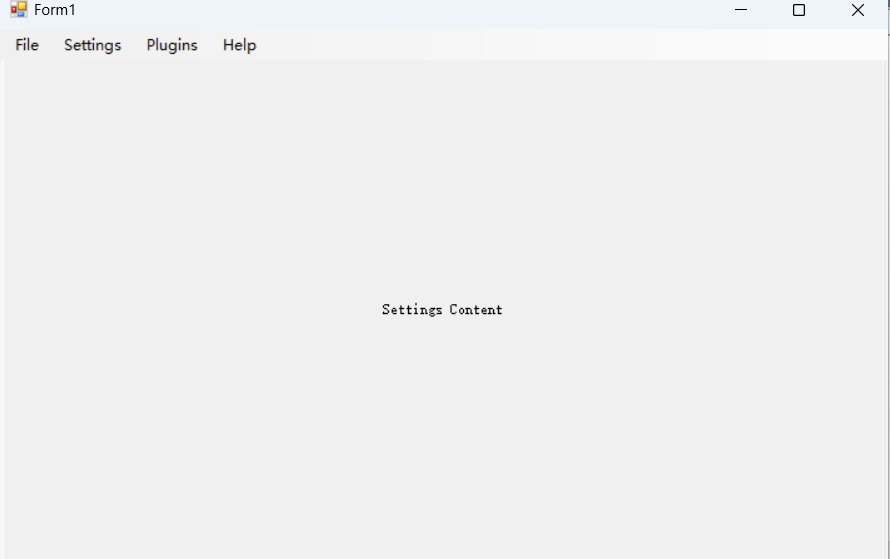
单窗口页面切换实现
之后我们先不急于实现业务逻辑,继续设计settings的UI。这里我不想弹出一个新的窗体进行窗口配置,目标就是在原先窗口中能有窗口选项卡进行切换。这里可以选择用TabControl组件进行实现。当用户点击
MenuStrip 中的 Settings 或 Help
等菜单项时,在 TabControl 中动态创建一个对应的
TabPage
组件。每个TabPage都能够往里面add各种控件,相当于一个我们要设计的页面,而主窗口显示哪个TabPage就是由TabControl进行控制。
先了解下TabControl的常用属性与方法:
常用属性
SelectedTab获取或设置当前选中的
TabPage。类型:
TabPageTabPages获取包含所有选项卡的
TabPageCollection,可以通过该属性访问、添加、删除选项卡。类型:
TabPageCollectionTabCount获取
TabControl中的选项卡数目。类型:
intAlignment获取或设置选项卡的对齐方式(例如,顶部、底部、左侧或右侧)。
类型:
TabAlignment1
tabControl.Alignment = TabAlignment.Top; // 顶部对齐
ItemSize获取或设置选项卡的大小(宽度和高度)。
类型:
Size1
tabControl.ItemSize = new Size(100, 30); // 设置选项卡宽度和高度
Multiline获取或设置是否允许选项卡多行显示。
类型:
boolTabIndex获取或设置
TabControl的索引(即它在窗体中所占的位置)。类型:
int1
2int tabIndex = tabControl.TabIndex;
tabControl.TabIndex = 1; // 设置选项卡的索引TabStop获取或设置是否允许在
TabControl中使用 Tab 键进行切换。类型:
bool1
tabControl.TabStop = false; // 禁用 Tab 键切换
Dock获取或设置
TabControl的停靠方式。类型:
DockStyle1
tabControl.Dock = DockStyle.Fill; // 填充整个容器
Height和Width获取或设置
TabControl的高度和宽度。类型:
int1
2tabControl.Height = 300; // 设置高度
tabControl.Width = 500; // 设置宽度
常用方法
Add(TabPage page)向
TabControl中添加一个新的TabPage。1
2TabPage newPage = new TabPage("New Tab");
tabControl.TabPages.Add(newPage);Remove(TabPage page)从
TabControl中移除一个TabPage。1
tabControl.TabPages.Remove(someTabPage);
Clear()清除所有的
TabPage。1
tabControl.TabPages.Clear(); // 清空所有选项卡
SelectTab(int index)通过索引选择某个
TabPage。1
tabControl.SelectTab(1); // 选择第2个选项卡(索引从0开始)
SelectTab(string tabName)通过选项卡的名称选择某个
TabPage。1
tabControl.SelectTab("TabName"); // 选择名称为 "TabName" 的选项卡
ContainsKey(string key)判断某个
TabPage是否存在,基于其Name属性。1
bool exists = tabControl.TabPages.ContainsKey("TabName");
Find(string key, bool searchAllTabs)查找具有指定名称的
TabPage,可以指定是否在所有选项卡中查找。1
TabPage foundTab = tabControl.TabPages.Find("TabName", true)[0];
EnableDoubleBuffering()设置
TabControl是否使用双缓冲机制(帮助避免闪烁)。1
tabControl.DoubleBuffered = true;
常用事件
SelectedIndexChanged当选中的选项卡发生变化时触发该事件。
1
2
3
4tabControl.SelectedIndexChanged += (s, e) =>
{
MessageBox.Show("选项卡已切换");
};Selecting当选项卡即将被选中时触发该事件。
1
2
3
4tabControl.Selecting += (s, e) =>
{
MessageBox.Show("选项卡正在被选择");
};Deselected当选项卡被取消选中时触发该事件。
1
2
3
4tabControl.Deselected += (s, e) =>
{
MessageBox.Show("选项卡已取消选择");
};TabIndexChanged当选项卡的索引发生变化时触发该事件。
1
2
3
4tabControl.TabIndexChanged += (s, e) =>
{
MessageBox.Show("选项卡索引发生变化");
};
具体实现
1 | //Form1.cs |
1 | //Form1.Designer.cs |
此时我们点击Settings就可以更改主窗口的显示了。
设置界面实现
这里由于settings是一块单独的逻辑设置,我们可以将其提取为一个单独的类,并且使用json来管理设置项。那么我们之后在主程序中要用到设置的内容时,只需要示例化设置对象并读取对应属性即可。而且可以在这个类中实现每一条配置的面板(包括标签与输入框或选项框)的返回。
1 | using System; |
这里我们设置SettingsData这个类的原因在于后面保存设置时,如果直接把Settings这个含有各个控件的类进行序列化,会遇到一个自引用循环。具体来说,ComboBox
控件中的某些属性(例如
AccessibilityObject)可能包含对该控件本身的引用,导致在序列化时发生死循环。所以这里我们把其设置属性全部提取到SettingsData来避免上述错误发生。
需要注意的是,settings.js的输出目录为projectdir/bin/Debug/settings.json,我们如果需要手动赋个初值,也需要在这个目录下创建,而不是直接用visual studio的创建文件功能。
布局设计
由于我们有很多选项需要显示在窗口中,所以我们要利用TableLayoutPanel、FlowLayoutPanel等布局控件来优化布局,不然一个一个设置坐标,还要想办法根据屏幕尺寸自适应,会相当麻烦。进阶一点可以使用 GroupBox 或者 TabControl 来进行更细化的分组。这里我们目前需要的选项较少,就先只用TableLayoutPanel进行布局。
1 | private void AddTab(string tabName) |
这里的OptionLanguageComboBox方法我们在下文中会给出具体实现。
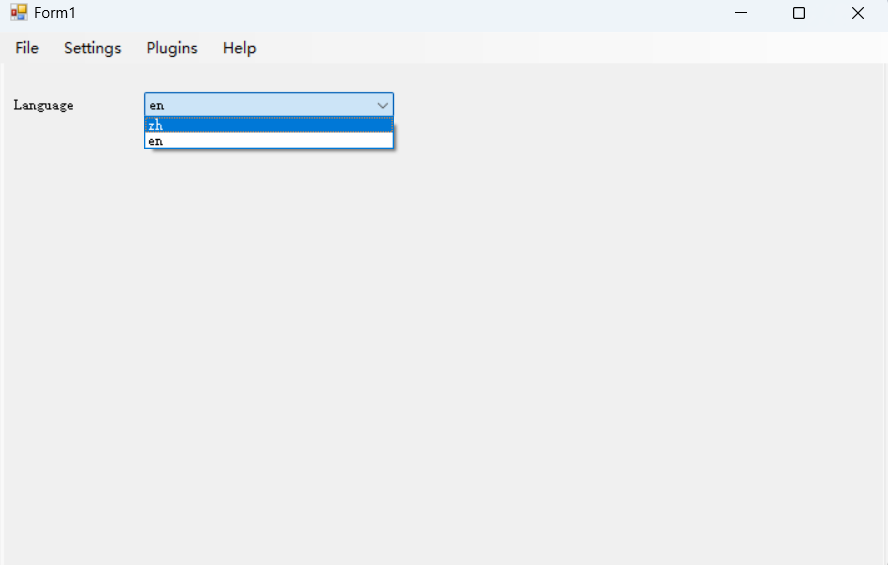
语言切换功能
目的是能够支持中文和英文两种语言。这里我们打算在
Settings 的 TabPage
中渲染一个选项条,点击后展示待选项,并且实现鼠标悬停时高亮显示选项。
在Settings.cs中加入如下几个方法:
1 | public Control CreateLanguageSetting() |
这里内部也是使用TableLayoutPanel进行布局,可以通过ColumnStyles设置列宽度,从而在一行中对标签以及选项框进行布局
可以看到已经成功的渲染出了选项标签与选择框。
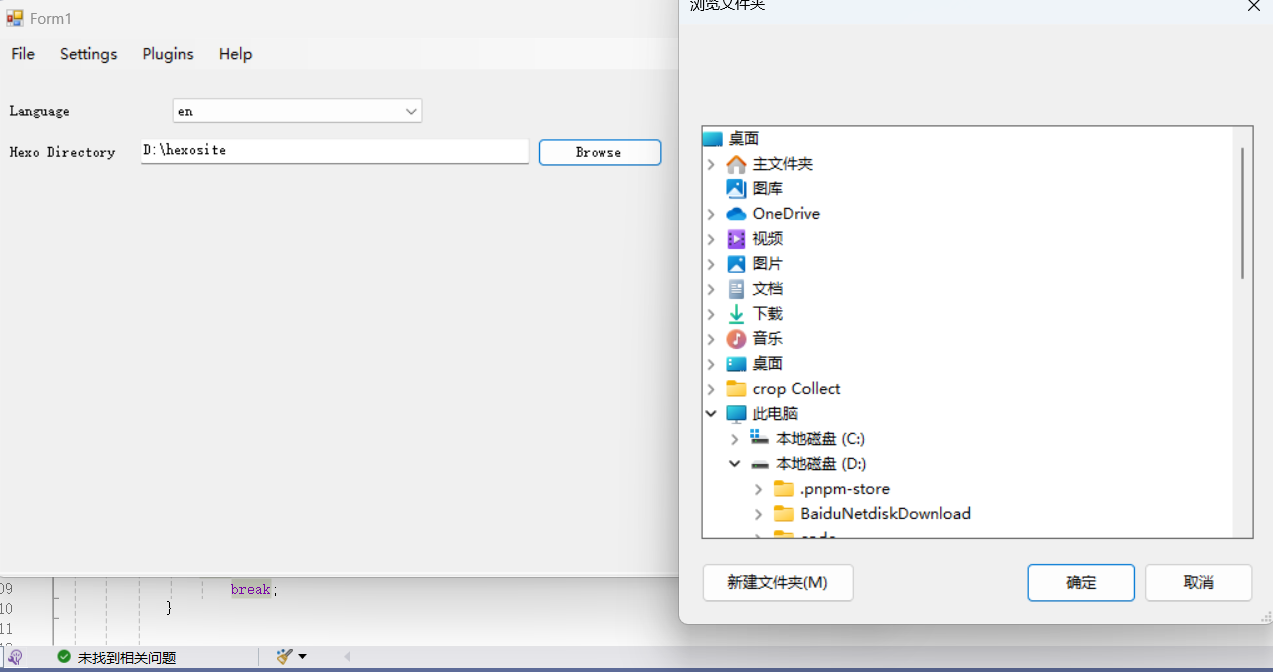
Hexo目录设置
1 | public Control CreateHexoDirectorySetting() |
选文件路径是用folderDialog,类似于之前可视化文件选取所用到的OpenFileDialog。这里我们也是返回一个tableLayoutPanel到主程序,然后再在主程序中将其增加到对应的设计面板tableLayoutPanel中,最后主程序把设计面板加入Settings的TabPage即可。
1 | ...... |
文件格式转换功能实现
前面我们已经解决了获取输入文件路径以及输出目录的问题,然后我们就可以着手实现我们的核心功能,也就是图片文件转移与输出目标格式文件。这里我们还可以可视化实现hexo文章标签与类别的设置。以下是整个FileProcessor.cs的实现。
1 | using System; |
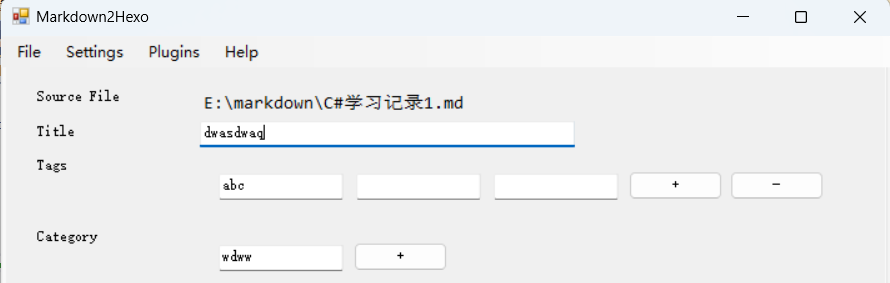
获取tags、categories等相关信息UI
主要也是用TableLayoutPanel进行页面设计,这里我们先改一下Form1.cs,让点击File的菜单栏后不是只有弹文件选择,而是先利用之前实现的AddTab来创建一个TabPage,然后再调用FileProcessor.cs中的CreateProcessMarkdownPanel方法来返回文件处理的面板。
1 | //Form1.cs |
每一行的设计也有区别,首先文章标题的输入可以直接使用TextBox文本框获取。而tags和categories由于可以存在多个,可行的方案之一是也用TextBox读取,然后指定某个分隔符来分开多个不同的tag和category。但这样显然比较麻烦,所以我们可以使用FlowLayoutPanel来进行动态的布局设计,目标是可以创建一系列不同的TextBox输入框,点击+按钮新建一个tag输入框,点击-按钮删除一个tag输入框。该布局模板可以动态的根据屏幕大小进行适应,比如可以自动换行,相当方便。+-按钮都要绑定一个点击事件。
1 | // 创建 FlowLayoutPanel 用来容纳多个输入框 |
然后就是核心的AddInputBox和RemoveInputBox函数实现。需要注意的是边界条件的处理,我们在只有一个输入框时可以不显示-按钮,以防止越界。而且如果直接往inputPanel(也就是调用者的tagsPanel)中加TextBox,会导致+-不显示在所有输入框之后,比较不美观。所以我们可以每次增加输入框时,先删去原来的+-按钮,待TextBox增加入控件后,最后再次添加按钮回来。这样就能确保按钮位置正确。这里抽象出了AddInputBox和RemoveInputBox函数是为了tag和category的处理都能够复用。
1 | private void AddInputBox(Control inputPanel, List<TextBox> textBoxesList, Button addButton, Button removeButton) |
获取用户输入的Tags和Category也比较方便。能够直接返回一个string类型的数组。
1 | // 获取用户输入的所有标签 |
然后可以添加一个提交按钮,来触发核心的文件处理函数。按钮点击后就可以隐藏,避免多次点击。
1 | // 创建确定按钮 |
消息窗口实现
实现了上述的UI以后,界面还是有点空旷,那么其实我们可以把一些执行中的过程信息显示出来,来丰富界面,实现如下:
1 | // 创建 Process 信息框 |
之后我们调用AppendMessage就可以直接把消息显示到屏幕上了。
文件具体处理实现
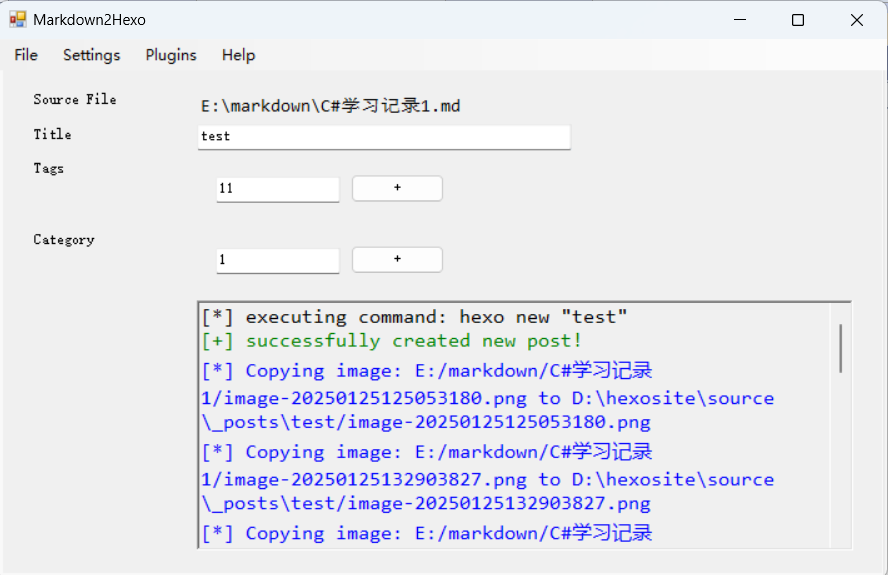
首先是要利用hexo的new命令来新建一个文章的架构,比较麻烦的是切换到Hexo的目录。首先我们要先从设置中读取出来,然后得截取出盘符,因为在windows上不能直接跨盘符用cd切换目录。最后才能执行hexo new title。这里用异步函数是为了在消息框显示内容更有层次感。
1 | public async void ProcessMarkdownFile(string title, List<string> tags, List<string> category, string filePath) |
然后是根据提供的几个参数来构建hexo的文章的YAML前言部分。
1 | // 构建 YAML 前言部分 |
最后就是将所有markdown文件中出现的图片通过正则匹配提取路径,并复制到指定目录,然后将图片语法替换成hexo能够解析的语法。最后将内容合并,写回hexo文章的markdown文件。
1 | // 正则表达式:查找所有的图片引用 |
这样以后,基本功能就差不多实现了,这里只对redefine这个主题进行了适配,别的Hexo主题可能需要调整细节。更多的设置功能也可以后续慢慢的添加进去。
常用控件
| 控件 | 常用属性 | 常用方法 |
|---|---|---|
| Label | - Text:显示的文本 - TextAlign:文本对齐方式 - Font:字体
- ForeColor:文本颜色 - BackColor:背景颜色 - AutoSize:是否自动调整大小 |
- SetBounds:设置控件的位置和大小 - Focus:设置焦点 |
| Button | - Text:按钮文本 - BackColor:按钮背景色 - ForeColor:按钮文字颜色 - Enabled:是否启用按钮 - Size:按钮大小
- Tag:关联的控件 |
- PerformClick():模拟点击按钮 - Click:按钮点击事件 |
| TextBox | - Text:输入文本 - TextAlign:文本对齐方式 - Multiline:是否多行文本框- MaxLength:最大字符长度 - PasswordChar:密码字符 |
- Clear():清除文本 - Focus():设置焦点 - SelectAll():全选文本 - Paste():粘贴 |
| ComboBox | - Items:项集合 - SelectedItem:选中的项 - SelectedIndex:选中的索引- DropDownStyle:下拉框风格(如
DropDownList) |
- Add():添加项 - Remove():移除项
- SelectedIndexChanged:选项变化事件 |
| ListBox | - Items:项集合 - SelectedItem:选中的项 - SelectedIndex:选中的索引 - MultiColumn:是否多列显示 |
- Add():添加项- Remove():移除项- Clear():清空项- SelectedIndexChanged:选项变化事件 |
| CheckBox | - Checked:是否选中 - Text:文本
- AutoSize:是否自动调整大小 - CheckState:勾选状态(Checked、Unchecked) |
- PerformClick():模拟点击 - CheckedChanged:选中状态变化事件 |
| RadioButton | - Checked:是否选中 - Text:文本
- GroupName:分组名称,防止多个单选框互相独立 |
- CheckedChanged:选中状态变化事件- PerformClick():模拟点击 |
| Panel | - BackColor:背景色 - Dock:停靠方式(如 DockStyle.Fill)- Padding:控件的内边距 |
- Controls.Add():向面板添加控件 - Controls.Remove():移除控件 |
| PictureBox | - Image:显示的图片 - SizeMode:图片显示方式(如
StretchImage、Zoom) - BackColor:背景颜色 |
- Load():加载图片 - Refresh():重绘图片 |
| RichTextBox | - Text:文本内容 - Font:字体
- SelectionStart:选中文本的起始位置- SelectionLength:选中文本的长度 |
- AppendText():追加文本 - Clear():清空文本 - Find():查找文本 |
| DateTimePicker | - Value:选定的日期时间 - Format:日期时间格式 - MinDate:最小日期
- MaxDate:最大日期 |
- CloseUp():关闭下拉日历 - DropDown():展开下拉日历 |
| TrackBar | - Minimum:最小值 - Maximum:最大值
- Value:当前值 - TickFrequency:刻度频率 |
- ValueChanged:值变化事件 |
| TabControl | - TabPages:Tab页集合 - SelectedTab:当前选中的Tab页 - Alignment:Tab的对齐方式 |
- SelectTab():切换选中的Tab |
| ToolTip | - ToolTipTitle:工具提示标题 - IsBalloon:是否气泡提示 - InitialDelay:首次显示延迟 |
- SetToolTip():为控件设置工具提示 |
| TreeView | - Nodes:树节点集合 - SelectedNode:选中的节点 - CheckBoxes:是否启用复选框 |
- ExpandAll():展开所有节点 - CollapseAll():折叠所有节点 |
| DateTimePicker | - Value:当前选中的日期时间 - Format:日期时间显示格式 |
- CloseUp():关闭日历窗口 - DropDown():打开日历窗口 |
- 标题: C#开发windows程序学习记录
- 作者: collectcrop
- 创建于 : 2025-01-28 00:45:46
- 更新于 : 2025-01-28 00:45:46
- 链接: https://collectcrop.github.io/2025/01/28/C-开发windows程序学习记录/
- 版权声明: 本文章采用 CC BY-NC-SA 4.0 进行许可。
